Basic git Commands for ACIS Operations
Setup Global git configuration
The first thing you should do, if you haven't already, is add your username and email to the global git configuration on your machine. What we do is set the name to our HEAD LAN username, but the email to acisdude so that the emails go out to everyone.
git config --global user.name "ggermain"
git config --global user.email acisdude@cfa.harvard.edu
ACIS Operations git Repositories
Our repositories live at http://github.com/acisops, and include code for thermal models, documentation, LR, and ACISpy. The instructions which follow below apply generally to all of these repositories.
Note
The acis_docs repository, though git-maintained, is a bit of a different beast. For information on it, see the acis_docs memo page.
Clone the Repository
Next, optionally make a place where you want to download the repository to. This will not be the place where the code itself lives but the place where the code directories are. Of course, you can always use a directory that already exists if you wish.
mkdir FPMODEL
cd FPMODEL
Now we can clone the source code itself for the repository that we are interested in working on, using git clone:
git clone git@github.com:acisops/acisfp_check.git
You should see output that looks like this:
Cloning into 'acisfp_check'...
remote: Counting objects: 27, done.
remote: Compressing objects: 100% (18/18), done.
remote: Total 27 (delta 6), reused 27 (delta 6), pack-reused 0
Receiving objects: 100% (27/27), 44.21 KiB | 0 bytes/s, done.
Resolving deltas: 100% (6/6), done.
Checking connectivity... done.
This will put the source code in a directory called acisfp_check. Now, change into this directory:
cd acisfp_check
ls
Which shows the latest and greatest version of the FP model:
ACISobs.py
FPS_NoPref.txt
MANIFEST
README.md
ReleaseNotes_V1.1.txt
ReleaseNotes_V1.2.txt
VERSION
acisfp_check.css
acisfp_check.py
acisfp_spec.json
dahtbon_history.rdb
html4css1.css
index.rst
index_template.rst
index_template_val_only.rst
runit
task_schedule.cfg
Some Basic Checks (optional)
Now, you can have a look at the git "remotes", which are the source repositories you can push and pull from. At the moment, there should only be one, the origin on GitHub:
git remote -v
origin      git@github.com:acisops/acisfp_check.git (fetch)
origin      git@github.com:acisops/acisfp_check.git (push)
You can also use git status to show the current status of your working directory:
git status
Since you haven't done anything, it shouldn't show anything:
On branch master
Your branch is up-to-date with 'origin/master'.
nothing to commit, working directory clean
Create a New Branch and Make Changes
But we do want to make some changes. We don't want to make the changes on the master branch, but instead what git calls a "feature" branch that we can use to make changes as we like without affecting the "gold standard" code. We do this using the git branch command. Create a branch name that identifies what you're trying to do. For example, if you're going to simply change what the README says, you may do:
git branch change_readme
and now move to this branch using git checkout:
git checkout change_readme
Switched to branch 'change_readme'
For your information, you can look at the branches that you have using git branch. You should see the master branch and the one you just made:
git branch -v
* change_readme   a605682 Merge pull request #6 from acisops/fp_title_change
  master          a605682 Merge pull request #6 from acisops/fp_title_change
Note that the current branch you're on is highlighted with an asterisk. Now, make edits to files as you wish. In this case, I'm going to make a minor change to the README.
Add Files to Index and Commit Changes
Now we are ready to commit some changes. If you run git status now, you'll see that your changes are reflected:
On branch change_readme
Changes not staged for commit:
(use "git add <file>..." to update what will be committed)
(use "git checkout -- <file>..." to discard changes in working directory)

    modified:   README.md

no changes added to commit (use "git add" and/or "git commit -a")
To select a subset of files to commit, use the git add command:
git add README.md
git add adds files to the "index", which is git-speak for the space in which where files are "staged" for being commited. If you want to simply add all of the files you've changed or added, use git add ..
When you're ready to commit your changes, use git commit:
git commit -m "Changing README"
The -m flag is for the message you want to tag the commit with to tell us what you did. If you don't add this flag with a message, an editor will pop up for you to write a message in. You should get something like:
[change_readme 8cb61a3] Changing README
 1 file changed, 1 insertion(+)
Push Changes to GitHub
The next thing to do is push your new branch up to the GitHub repository. You do that like this:
git push origin change_readme
which will give you something like this:
Counting objects: 3, done.
Delta compression using up to 4 threads.
Compressing objects: 100% (3/3), done.
Writing objects: 100% (3/3), 324 bytes | 0 bytes/s, done.
Total 3 (delta 2), reused 0 (delta 0)
remote: Resolving deltas: 100% (2/2), completed with 2 local objects.
To github.com:acisops/acisfp_check.git
 * [new branch]      change_readme -> change_readme
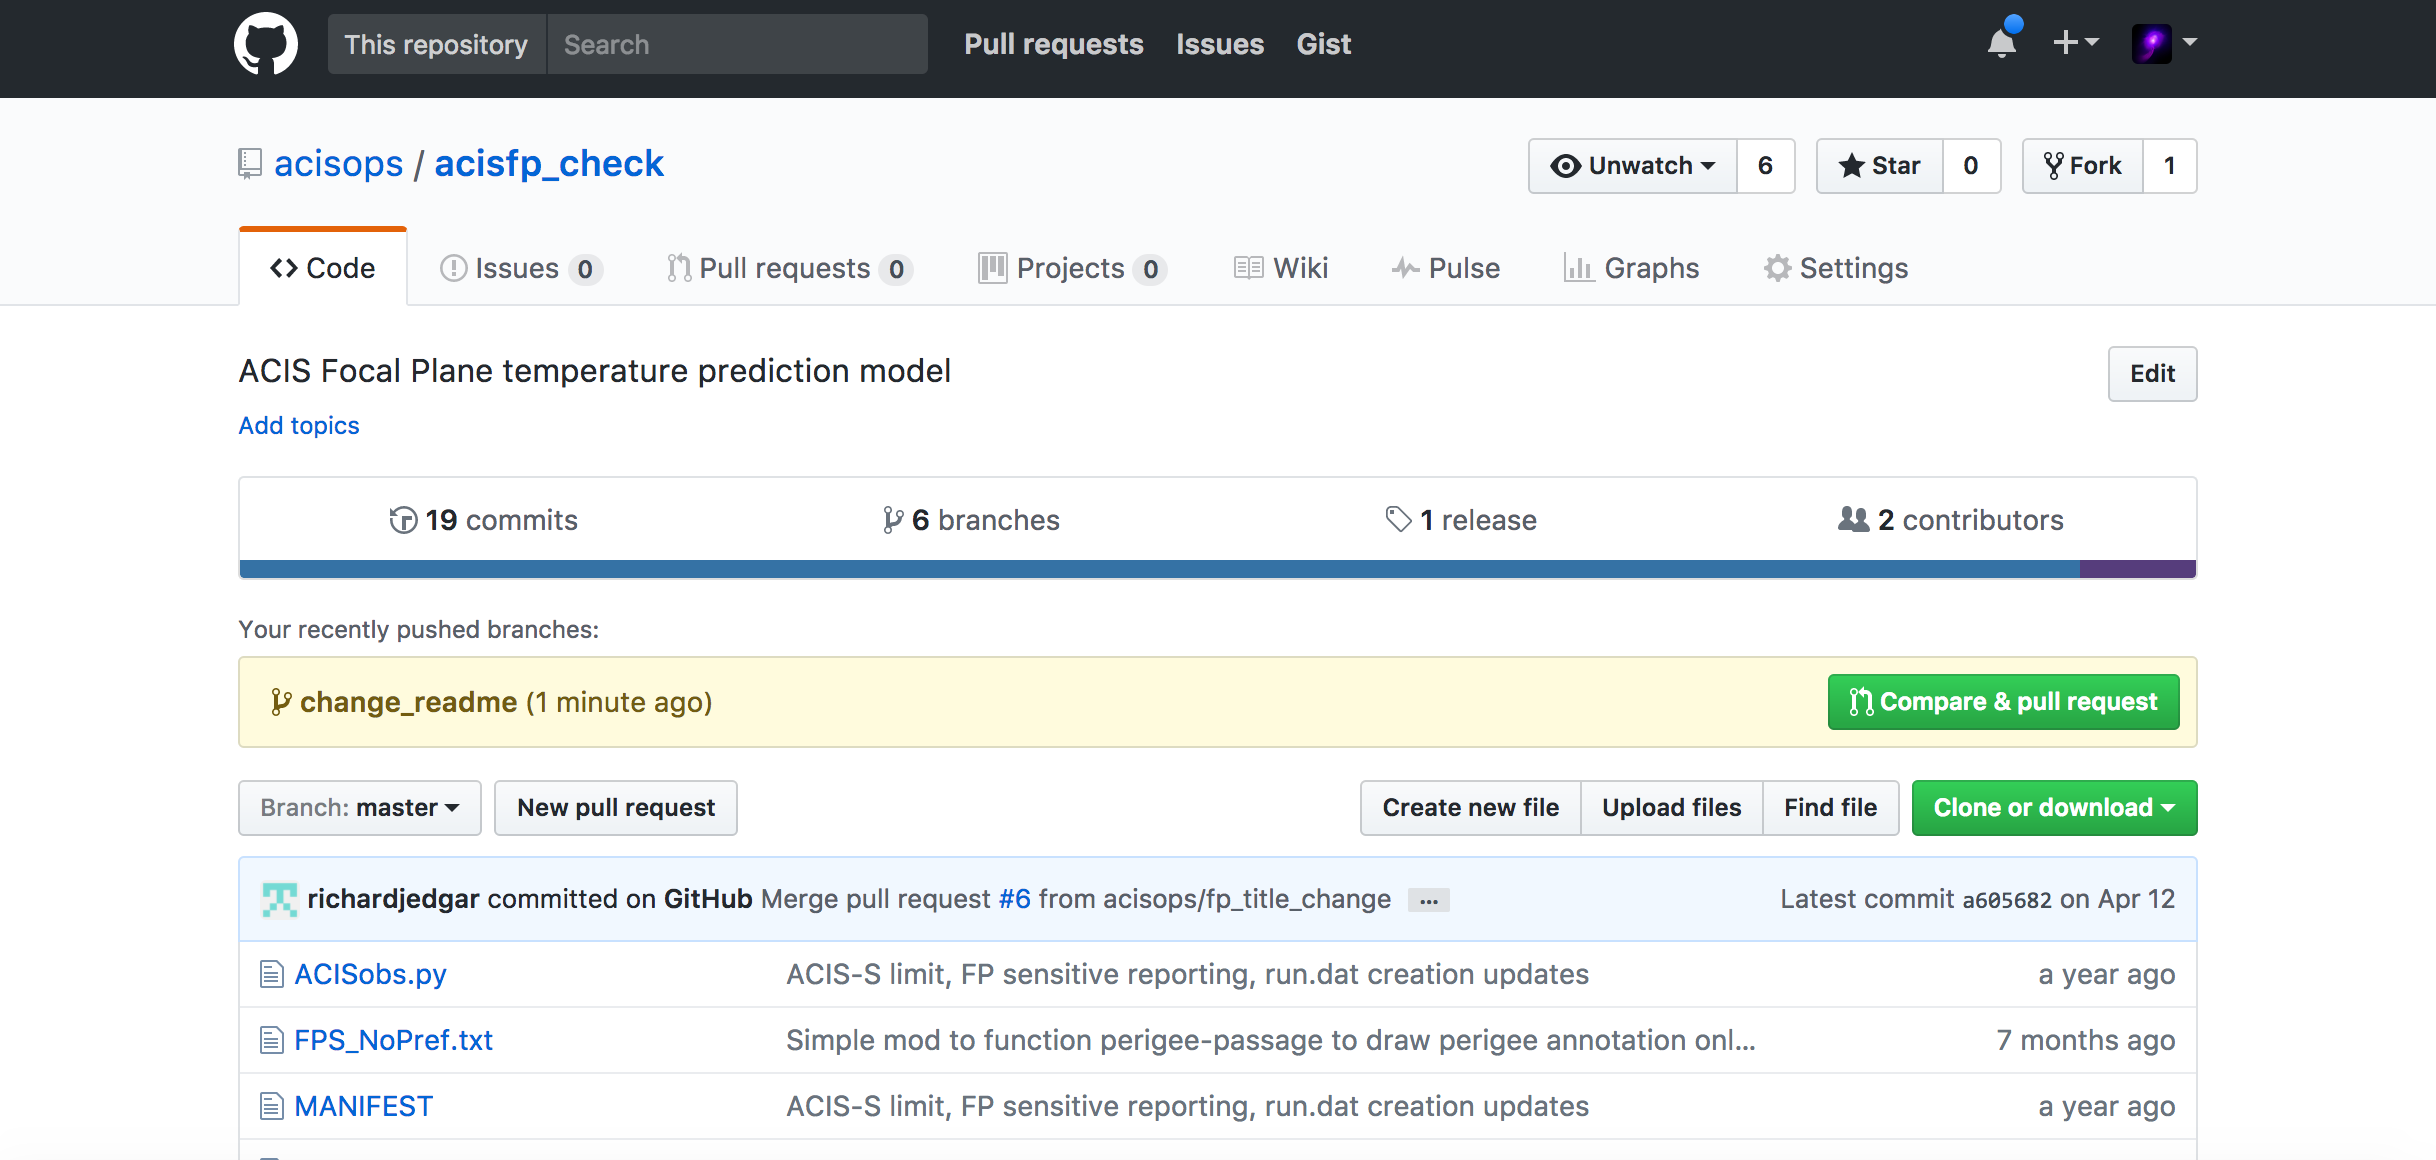
The GitHub repository now has the branch you made your changes on. However, the changes are still not in the master branch. Also, this doesn't notify anyone what you did, except that there will be a Slack notification in the #software channel:

To move forward, you now have to submit a pull request for review to merge changes into master.
Make a Pull Request
A pull request is made on the GitHub website itself. The basic procedure is this:
- Sign in to http://github.com
- Go to the repository in question (in this case, http://github.com/acisops/acisfp_check)
- Click on the green button that says "Compare & pull request" which is associated with your branch name
The figure below shows what this will look like:
Once you've hit that button, you'll be taken to a page that looks like this:
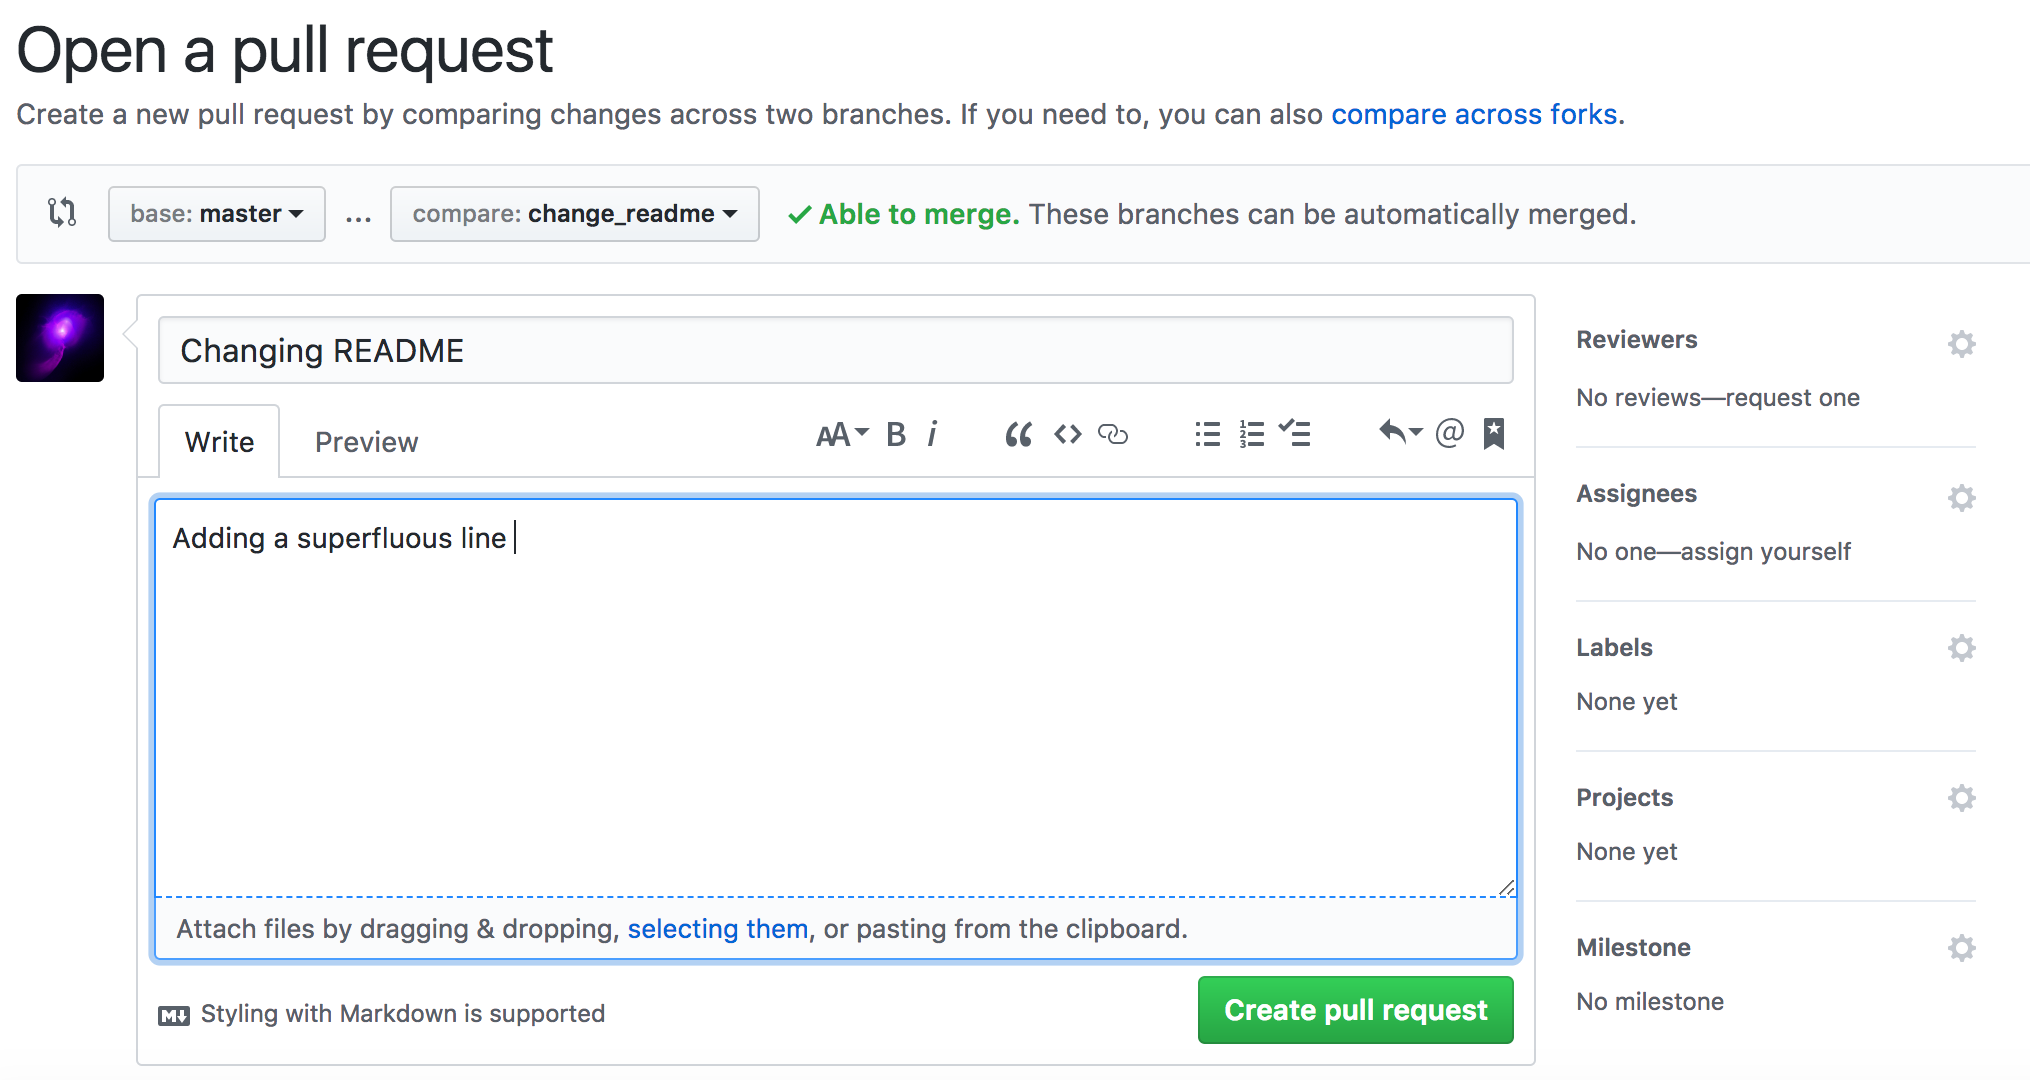
In the first box you can change the pull request title. In the bigger one below you can add some further comments. You can also drop pictures into this box.
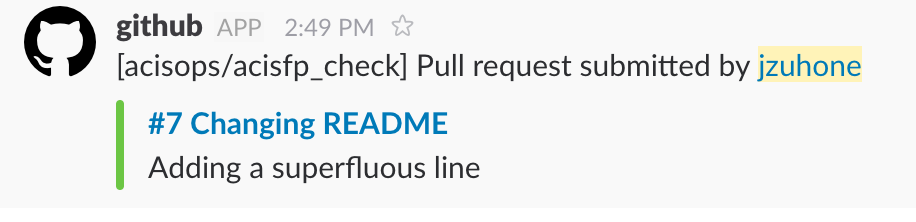
Once you are done, hit the green button that says "Create pull request". To notify the team, either email acisdude, or add request reviews for the pull request using the "Reviewers" dialog on the right side of the pull request page. Also, Slack will pop up a message in the #software channel:
Review and Merging the Pull Request
After a lot of talking, enough people will approve of the change such that someone other than the author of the change can click on the green "Merge pull request" button:
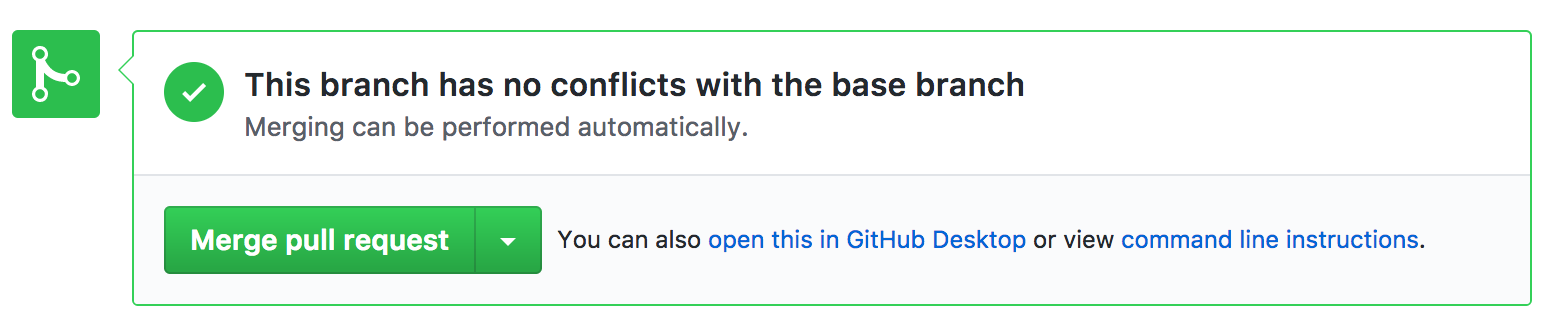
Which then merges the changes in your branch in the repository's master branch.
Delete the Branch (optional)
After the change is merged in, you will see a section at the bottom which looks something like this:

You can hit the "Delete branch" button to get rid of the branch on GitHub and keep things tidy, though this isn't strictly necessary.